The Murodas Jump System
High jumpers’ safest and most efficient standards.
The Murodas Jump System (“MJS” or “Murodas”) is a combination of posts, bungee cord, and apparatus that simulates a typical high jump standard and bar assembly. MJS helps athletes stay safe while increasing confidence when laying out over the bar.
By not having to replace the bar after a missed jump attempt, the Murodas allows coaches and athletes to increase the number of reps taken. The light weight of the Murodas relieves athletes and coaches of the hassle of having to move the heavy and bulky competition standards in and out each practice session.
LET'S COMPARE - WHY CHOOSE MURODAS?
Typical High Jump Assemblies
Regular standards are very heavy and must be wheeled to the pit.
These standards must be lifted over any curb that separates the track from the jumping apron.
Bar is replaced after each miss.
Bar platforms are raised and lowered by hand adjustment at each post - a slow process.
A high jump bar is unforgiving-it hurts when one lands on one!
MURODAS JUMP SYSTEM
Exceptionally light, easy to set up - carry the entire two standards assembly at one time
Flexible positioning - works with most types of pits
Disassemble the MJS unit to fit into your trunk or kit bag.
Quick height changing from 3'6" to 7'0".
No bar to pick up after each missed attempt.
Reduce injuries and remove fear of landing on the bar.
Use indoors or outdoors.
USA-assembled
What’s in the box?
2 Pedestals with Footpads attached.
2 sets of 3 attachable Post Pieces (Bottom, Center, and Top) with Joint Plugs and Connectors which together comprise each of the left and right Post standards.
Each Bottom Post Piece comes with a movable Spacer and an embedded nut at the bottom to receive the Pedestal Up Bolt.
Each Top Post Piece has a capped top end.
1 flex cord Apparatus with crimped ends, 2 Grant Fixtures and 2 Clips in place.
MASTER SHEET – MURODAS JUMP SYSTEM - packing list, assembly instructions and usage tips.
MJS Assembly Instructions
Set the Pedestals flat on the surface, Foot Pads up.
Screw the female ends of the Bottom Post Piece tightly onto the male bolts in the bottoms of the Foot Pads.
Turn the Foot Pad Knob several times so the shank protrudes a little into the tube, rest the Spacer on the shank to help center the post, and finally tighten the Foot Pad Knob so the pole does not wobble.
Connect the Middle Post Piece to the Bottom Post Piece - then the Top Post Piece to the Middle Post Piece.
When assembling the post standard components, make sure that the connections are screwed tightly together; careless threading can cause the joints to wiggle.
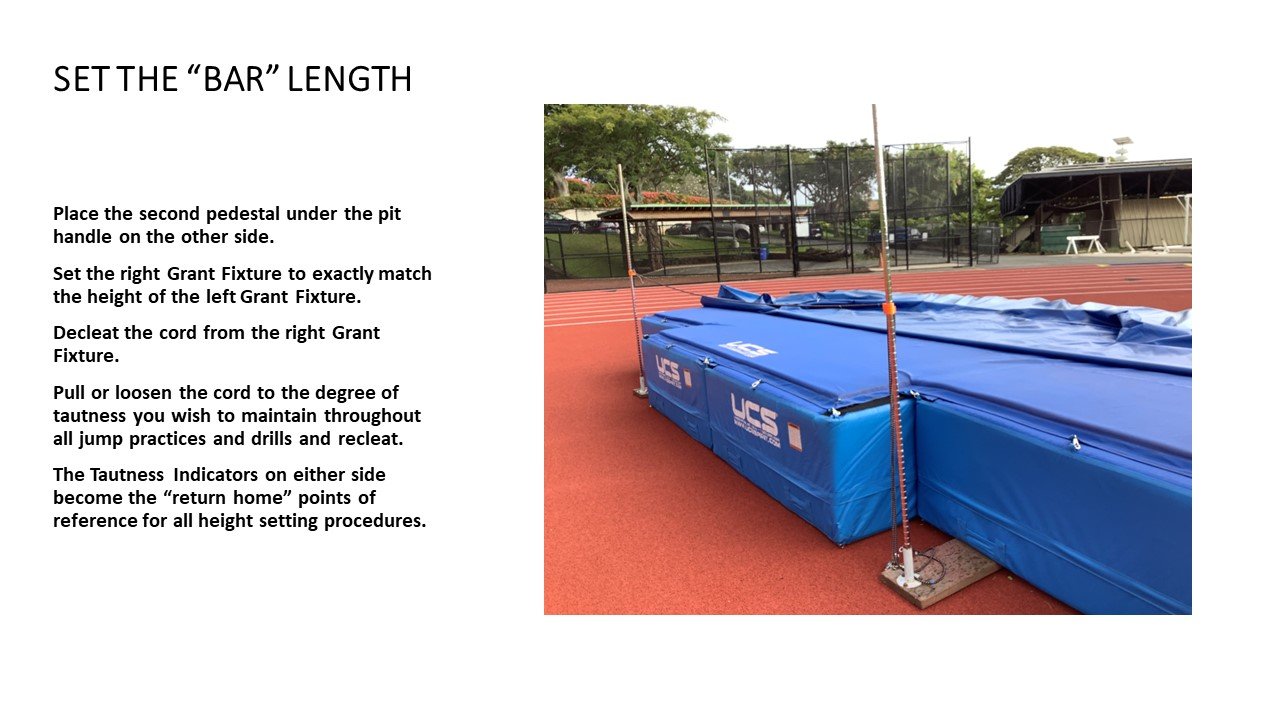
Slip each Grant Fixture over each post - the Apparatus cord runs between the standards, and the cord tails hang down.
The Grant Fixtures move freely up and down until the standards are set far enough apart so that force is applied through the cord, and the Grant Fixtures no longer slide.
To determine the proper amount of sag, set the two standards in the proper places next to the pit. Pull the first cord end down and then back towards the pit to cleat it. Pull the opposite cord end down until the desired amount of sag is achieved and then cleat it.
This is a good time to use the Clips to mark the locations of the Grant Fixtures on the cord for future reference.
Usage Tips
If the cord slacks during jumping, it is because the fronts of the Pedestals have rotated towards each other; merely restore the initial parallel-to-each-other Pedestal placement.
If one applies a lot of unusual downward pull on the cord 24” or less from the post, the closest Grant Fixture may slip. This is not something that would occur during normal jump practice.
The Grant Fixtures may “jump up” after a load has been applied stretching the cord beyond a normal reaction time, i.e., cord is caught under a jumper after attempting a high height; just reset the Grant Fixtures to the former position.
After practice is finished, lift the Posts below the first joint and carry the MJS units back to the equipment shed.
The Apparatus may slip during such movement – this does not affect storage.
Once assembled initially, there is no need to dismantle the MJS unit unless one is taking it somewhere else in the car trunk or storing it in a limited space.
About the System
Scroll through the slideshow below to learn more.


